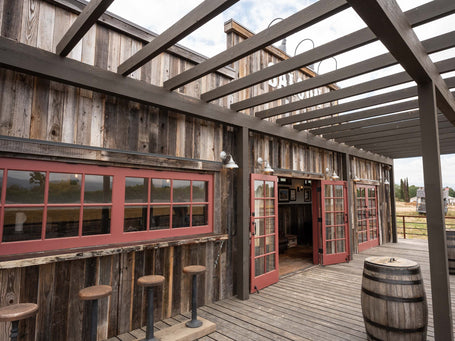
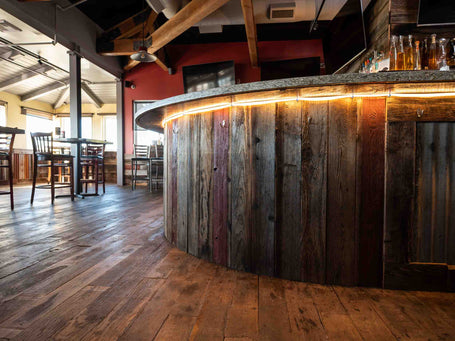
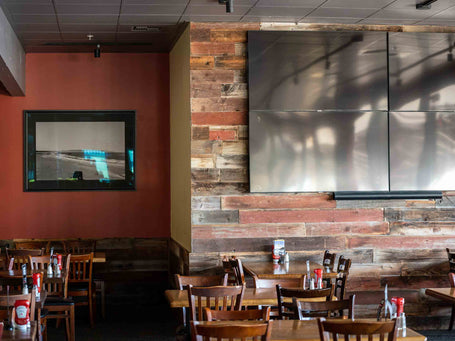
Installing tongue and groove wood wall paneling is a great way to add warmth and character to any room. This type of paneling features interlocking edges that fit together, creating a seamless and durable surface. We provide high-quality reclaimed wood for your paneling projects. This step-by-step guide will help you install tongue and groove wood wall paneling.
Materials and Tools You'll Need
Materials
- Tongue and groove wood planks (sourced from Huasna)
- Plywood or furring strips (for backing, if needed)
- Construction adhesive
- Finishing nails or wood screws
- Wood filler (optional)
- Sandpaper (optional)
- Wood stain or sealant (optional)
Tools
- Measuring tape
- Level
- Stud finder
- Circular saw or miter saw
- Hammer or nail gun
- Drill and screwdriver
- Rubber mallet
- Paintbrush or cloth (for stain/sealant)
- Safety gear (gloves, goggles, dust mask)
Step-by-Step Guide to Installing Tongue and Groove Paneling
Step 1: Prepare the Wall
Measure and Plan
Begin by measuring the wall where you plan to install the wood paneling. This will help you determine the amount of wood you'll need. Draw a rough sketch of your design and plan the layout of the planks.
Find and Mark Studs
Using a stud finder, locate the studs in the wall. Mark the locations with a pencil. This is crucial for securing the wood planks properly.
Prepare the Surface
If you're attaching the wood directly to drywall, consider installing a plywood backing or furring strips to provide a secure base. Attach the plywood or furring strips to the studs using screws.
Step 2: Cut and Prepare the Wood
Measure and Cut Planks
Measure each section of the wall and cut the wood planks to the appropriate lengths using a circular saw or miter saw. Remember to account for any outlets, switches, or other obstacles.
Sand and Finish (Optional)
If desired, lightly sand the edges and surfaces of the planks to remove any rough spots. You can also apply a wood stain or sealant to enhance the wood’s natural beauty and protect it from wear and tear.
Step 3: Install the Wood Planks
Start with the First Row
Begin at the bottom of the wall. Place the first plank with the groove side down and the tongue side up. Use a level to ensure it is straight.
Apply Adhesive
Apply construction adhesive to the back of the first plank. Press it firmly against the wall. Use finishing nails or wood screws to secure the plank to the studs or backing.
Continue Installing Planks
Fit the tongue of the next plank into the groove of the first plank. Tap the plank into place with a rubber mallet to ensure a tight fit. Apply adhesive to the back and secure it with nails or screws. Continue this process, working your way up the wall.
Step 4: Finishing Touches
Fill Gaps and Holes
If there are any gaps between the planks or visible nail holes, you can fill them with wood filler. Allow the filler to dry, then sand it smooth.
Final Sanding and Sealing
If you haven’t already, you can now sand the entire wall lightly to smooth out any rough edges. Apply a final coat of sealant to protect the wood and enhance its appearance.
Enjoy Your New Wood Paneling
Step Back and Admire
Take a step back and admire your work. Your new tongue and groove wood wall paneling adds a unique, rustic charm to your space, making it a cozy and inviting focal point.
Share Your Project
We'd love to see your finished project! Share your photos and experiences with Huasna on our social media channels or send us an email. Your creativity and craftsmanship inspire us and our community of DIY enthusiasts.
Why Choose Huasna?
We are dedicated to providing the finest reclaimed wood for your projects. Our barn wood planks are carefully sourced from authentic structures, ensuring that each piece has its own unique character and history. We prioritize sustainability and quality, providing materials that are both environmentally friendly and built to last.
Whether you're a DIY enthusiast looking to tackle a new project or a professional designer seeking unique materials for a client's space, we're here to inspire and support you every step of the way. Explore our collection of reclaimed wood and let the timeless beauty of reclaimed wood transform your home into a haven of warmth, history, and creativity.


